
How to Install Pathway Lights for Maximum Effect
The Best Ways to Install Pathway Lights for Maximum Effect
Pathway lights not only help illuminate your outdoor paths for safety and convenience but also add an elegant touch to your landscaping. Whether you're lighting a garden walkway, driveway, or garden path, how you place your pathway lights can make a big difference. Properly installed
path lighting can create a warm, welcoming ambiance while enhancing the beauty of your outdoor space. Here are the best ways to place pathway lights for maximum effect.
1. Start with the Right Path Lighting Design
Before you dive into installation, it’s essential to plan your path lighting design. The right design ensures both functionality and aesthetics.
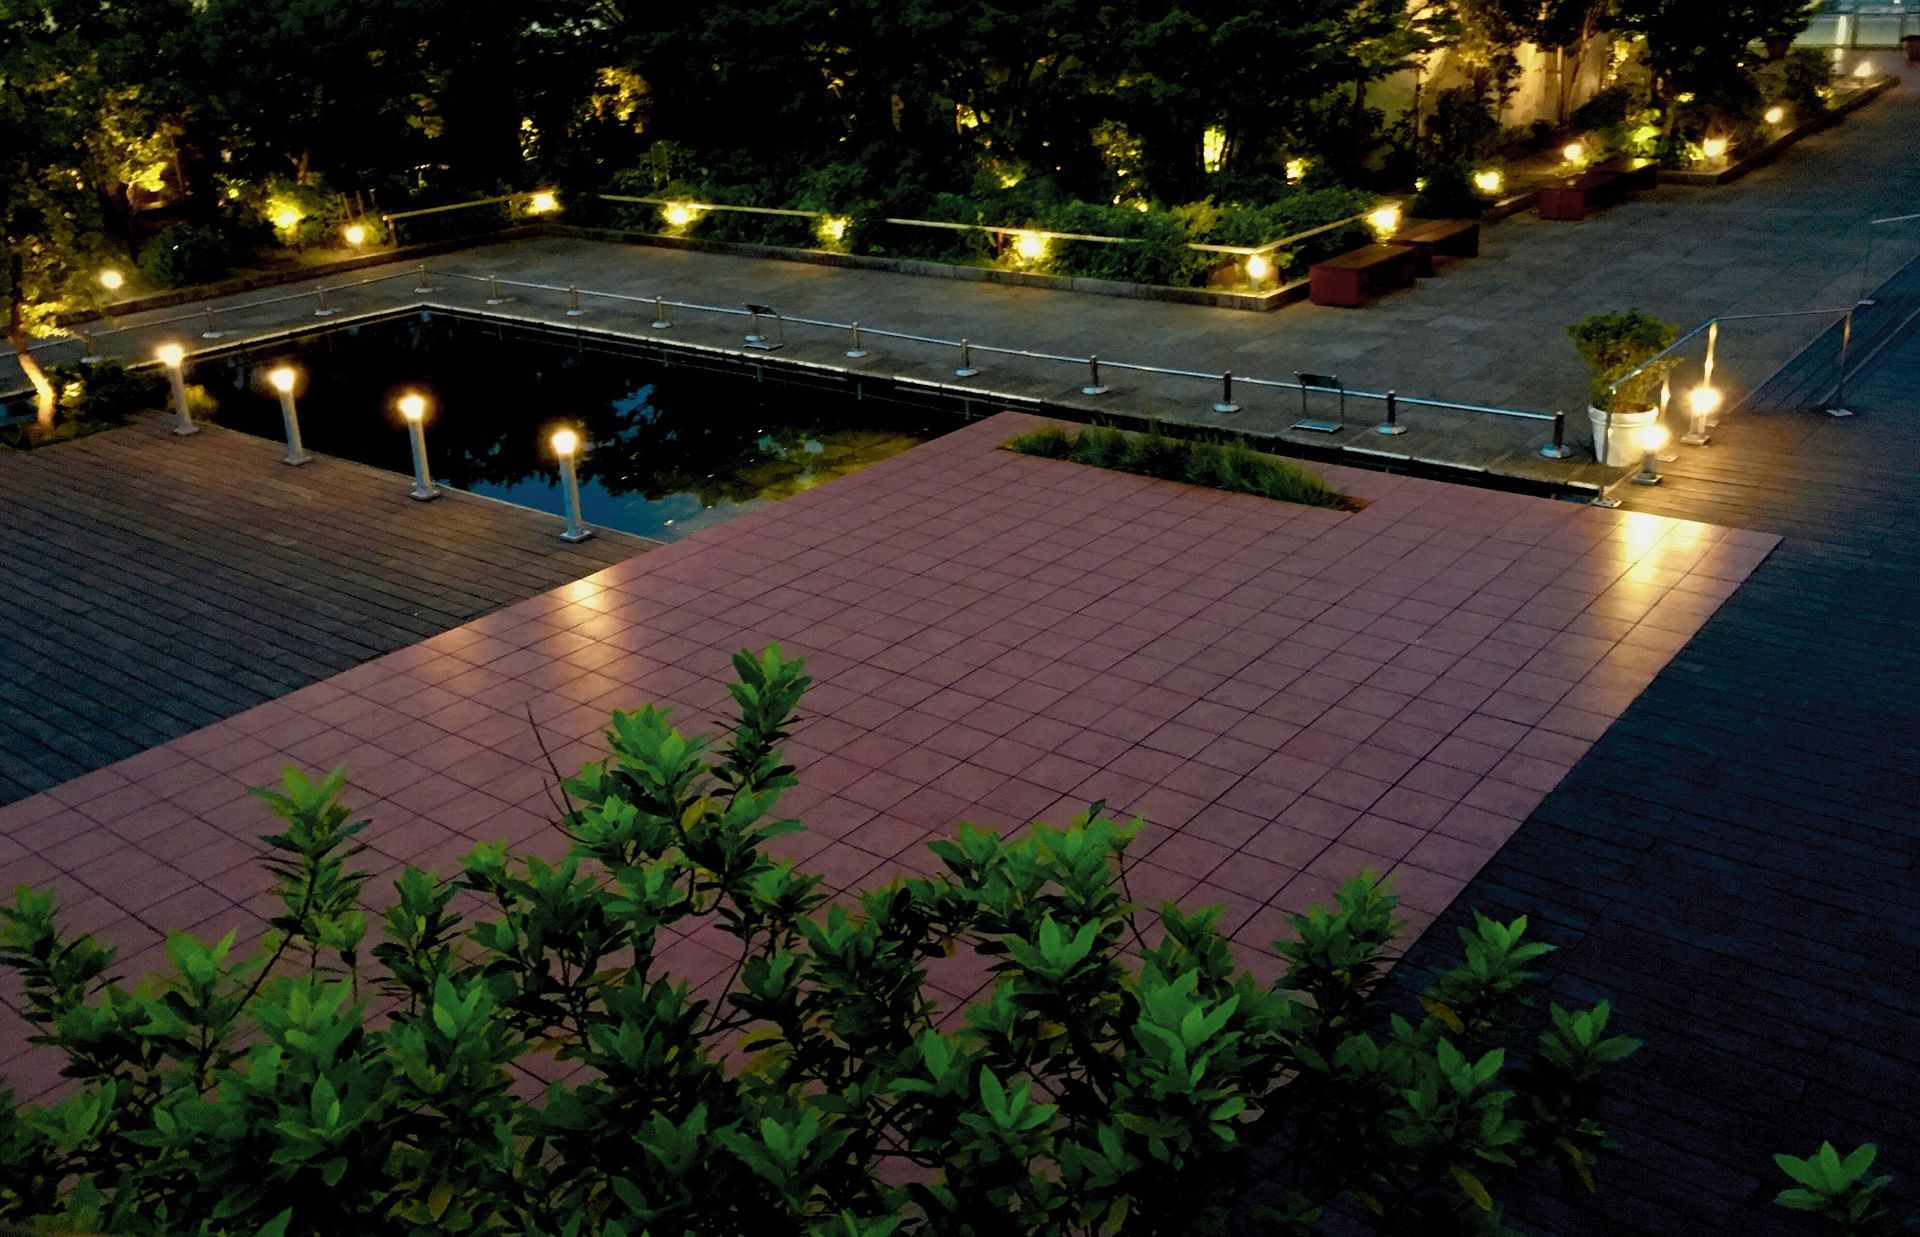
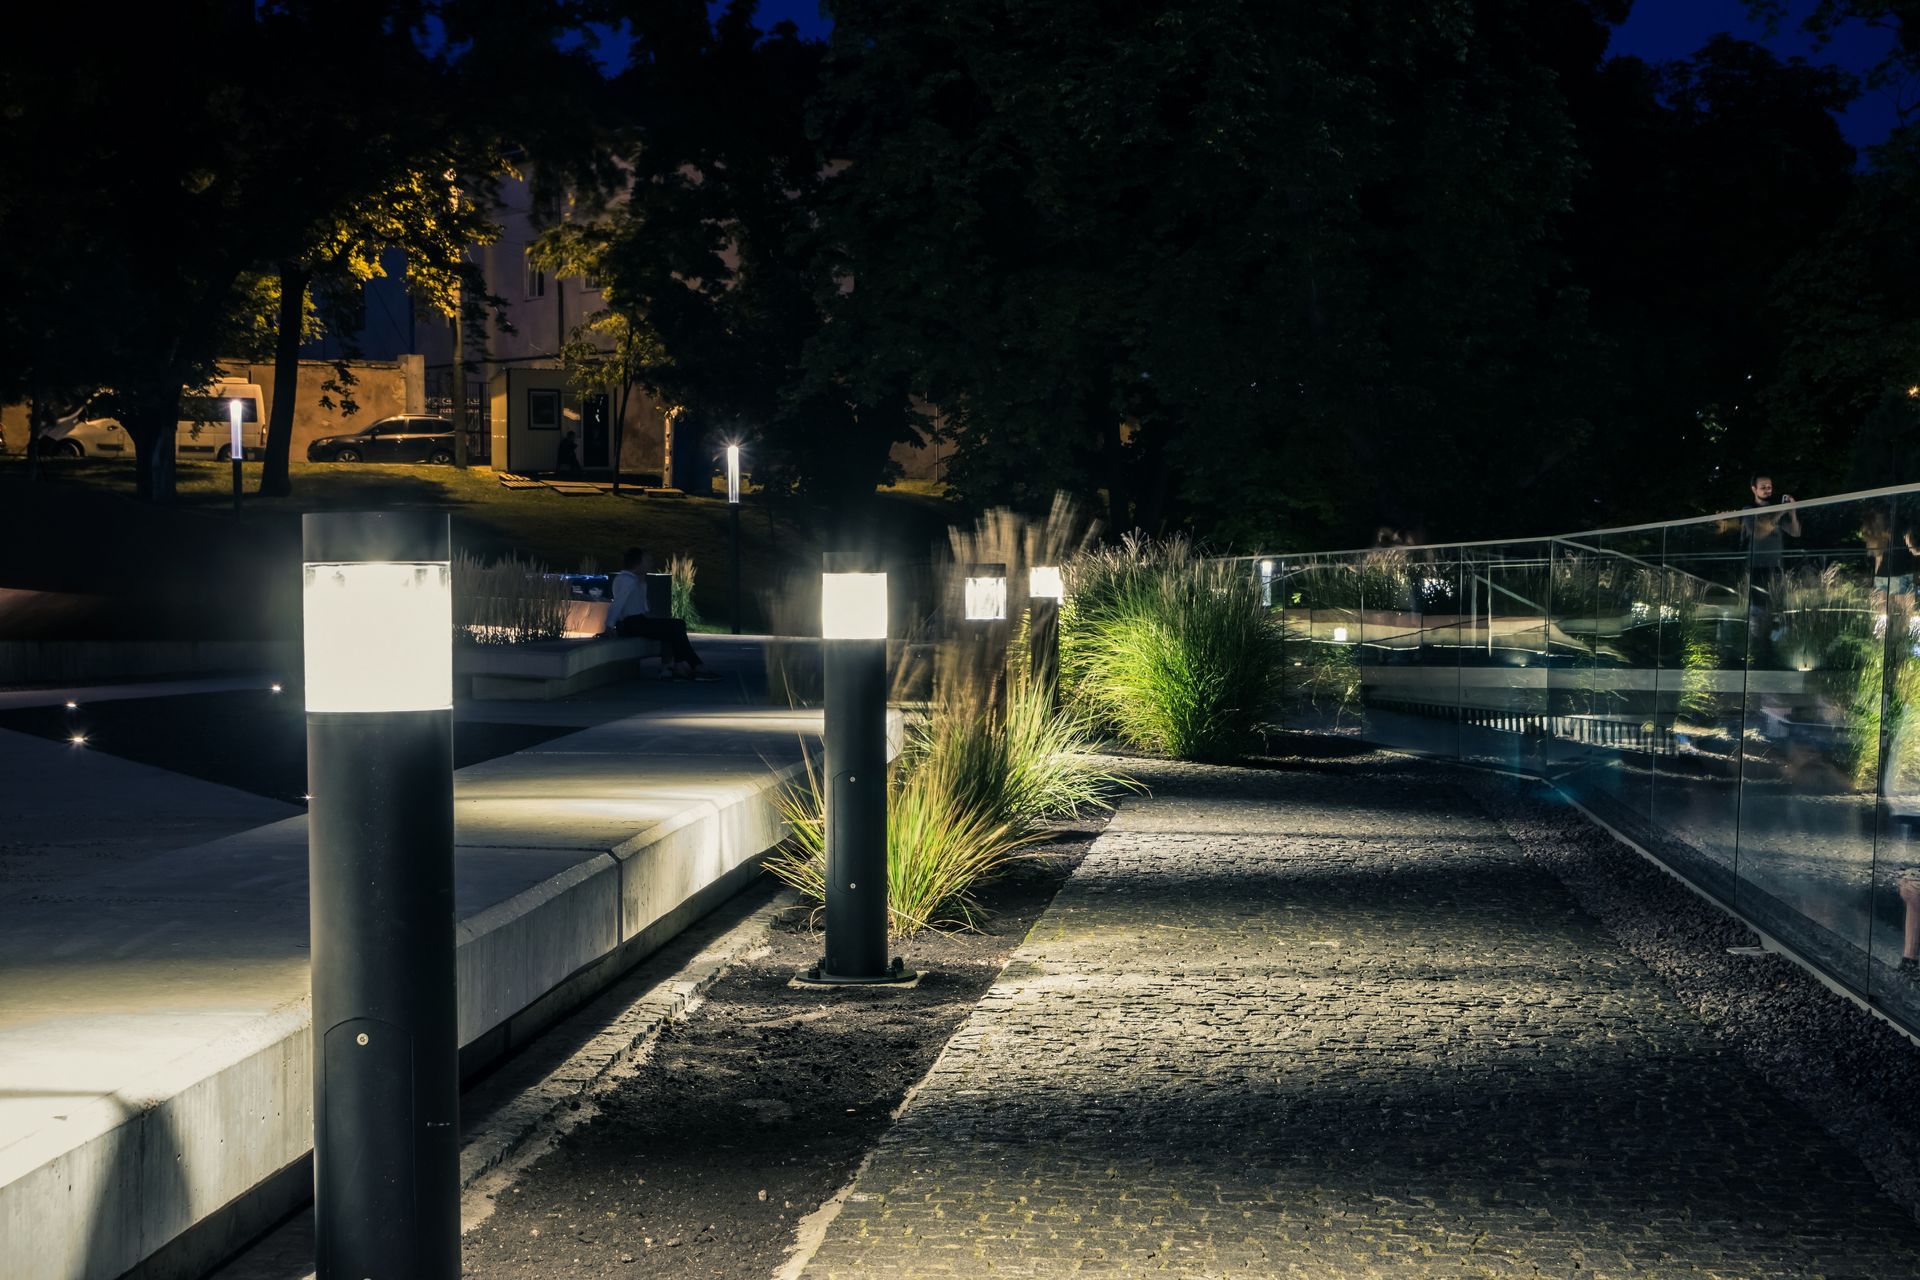
Define the Pathway: Decide which parts of your path you want to highlight. You can place lights on both sides of the walkway or along just one side, depending on your preference.- Consider Spacing: Pathway lights should be spaced evenly to create a continuous light flow.
- Typically, lights should be spaced about 6 to 8 feet apart, but you can adjust the spacing based on the brightness and design you're aiming for.
- Layer Lighting: Use different lighting types for depth and variety. For example, you might combine path lights with accent lighting to highlight specific features along the path.
A well-planned lighting design ensures that your path looks beautiful while providing the right amount of illumination.
2. Position Lights at the Right Height
The height at which you place your pathway lights plays a crucial role in the light's effectiveness.
Standard Height: Pathway lights are typically placed 18 to 24 inches above the ground. This height ensures the light is visible and effective without being too overpowering.- Avoid Overhead Obstructions: When installing lights along plants, trees, or walls, make sure the light is not blocked by branches or foliage, which could limit its effectiveness.
- Consider Landscape Features: If you have tall plants or structures along the path, position lights slightly higher or further away to illuminate them without causing glare.
By carefully adjusting the height of your pathway lights, you ensure that your path is illuminated without obstructing views or creating unwanted shadows.
3. Use Path Lighting to Enhance the Landscape
Pathway lights can serve a dual purpose: guiding your way while highlighting key features of your outdoor space. Here's how you can use path lighting to enhance your landscaping:
Highlight Garden Features: Position lights near trees, shrubs, or flowers to make them stand out at night. This adds beauty and makes the area feel more inviting.- Illuminate Edges and Curves: When lighting curved or winding paths, place lights to follow the natural flow of the path. This will create a visually pleasing effect and help guide people along the route.
- Add Drama with Shadows: By placing lights strategically, you can create interesting shadows that add depth and drama to your landscape. For example, use path lighting to cast shadows on interesting structures or plants for added visual interest.
With thoughtful placement,
path lighting can bring attention to your landscaping features and transform your garden or yard into a magical nighttime space.
4. Consider the Type of Pathway Lights
Different types of path lights create varying effects, so it’s important to choose the right lighting for your desired look:
Solar Pathway Lights: These are energy-efficient and easy to install, as they don’t require wiring. They are a great option for simple, low-maintenance lighting solutions. However, their brightness may be limited depending on the sunlight they receive.- Low-Voltage Pathway Lights: Low-voltage lights are more powerful than solar lights and can be customized with a larger range of styles and brightness. They require some wiring, but they offer better performance and can be used for more complex designs.
- LED Path Lights: LED lights are highly energy-efficient, durable, and available in a variety of designs. LED pathway lights can be low-voltage or solar, depending on the model, and provide a long-lasting solution for path lighting.
Choosing the right type of path lighting ensures that your pathway is illuminated exactly how you envision it—whether you’re looking for energy efficiency, bright light, or easy installation.
5. Avoid Too Much Light
While you want to illuminate your pathway, too much light can create a harsh and uncomfortable environment. Here’s how to avoid overlighting:
Opt for Soft Lighting: Choose lights that provide soft, diffused illumination rather than harsh beams. Soft light creates a welcoming ambiance without being too overpowering.- Dimmer Options: If you want to control the brightness, consider using path lights with a dimmer feature. This lets you adjust the light to suit the mood, from a soft glow for evening walks to brighter illumination for security.
By balancing the amount of light, you create a comfortable atmosphere that highlights your pathway without overwhelming the space.
6. Test and Adjust for Perfect Illumination
Once your pathway lights are installed, it’s time to test and adjust them for maximum effect.
Walk the Path: Take a walk along your pathway in the evening to check how the lights are placed. Adjust their position if needed to ensure they illuminate the path effectively and highlight key features.- Check for Overlapping Shadows: Ensure that lights are positioned so they don’t cast overlapping shadows. This can be distracting and take away from the clean look you’re aiming for.
- Consider Seasonal Changes: Keep in mind that as plants grow or trees shed leaves, your pathway lighting’s effectiveness may change. Be ready to adjust the positioning as needed.
Testing and tweaking your path lighting will ensure that it serves its purpose and enhances the beauty of your outdoor space.
Conclusion:
Properly placed pathway lights can transform your outdoor spaces, making them safer, more functional, and visually appealing. By planning your lighting design, positioning the lights correctly, and choosing the right fixtures, you can create an inviting, well-lit pathway that enhances your home’s curb appeal. If you need expert advice on how to place pathway lights for maximum effect, contact
AktrimLight today. We offer a wide range of high-quality, energy-efficient lighting solutions to help you achieve the perfect look for your outdoor paths.